🙋🏽♀️Where to Start with BossMailer 📺 for South Africans ⛳
Welcome to the BossMailer tutorial! Whether you’re new to email marketing or switching platforms, this guide will take you step-by-step through the process of setting up your first list, creating templates, and sending your first campaign. Let’s get started!
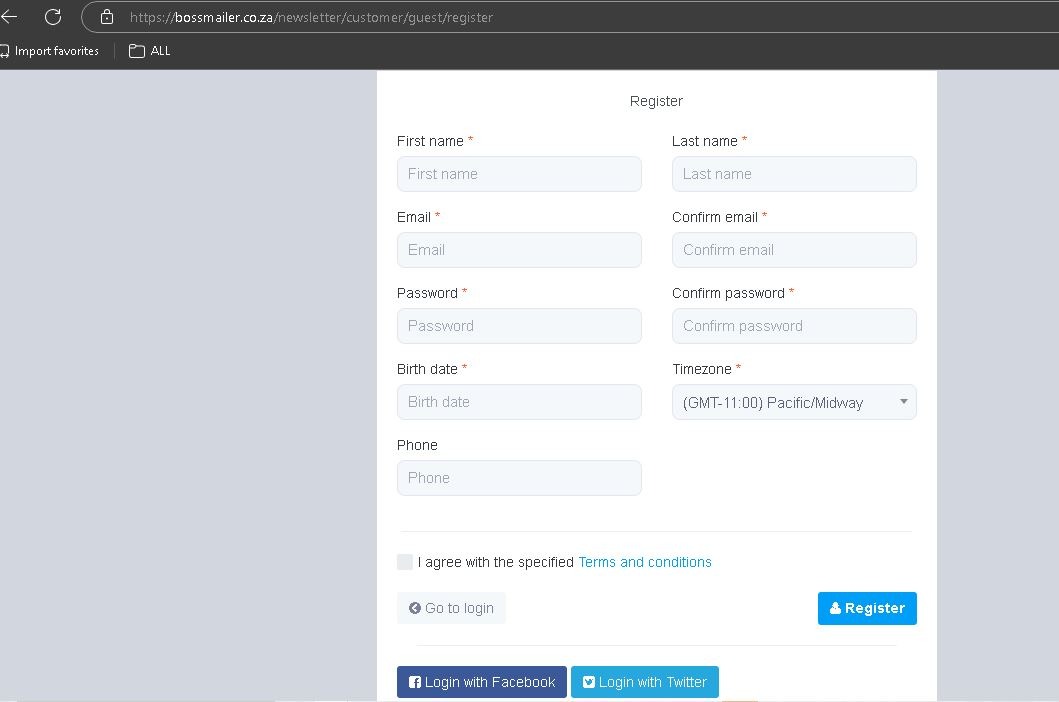
Signup for a FREE account. Signup with your work email or use our secure social login, which gives your personal info an extra layer of protection.
After verifying your email, login to the website with your email or by using our Simple Secure Social Login.
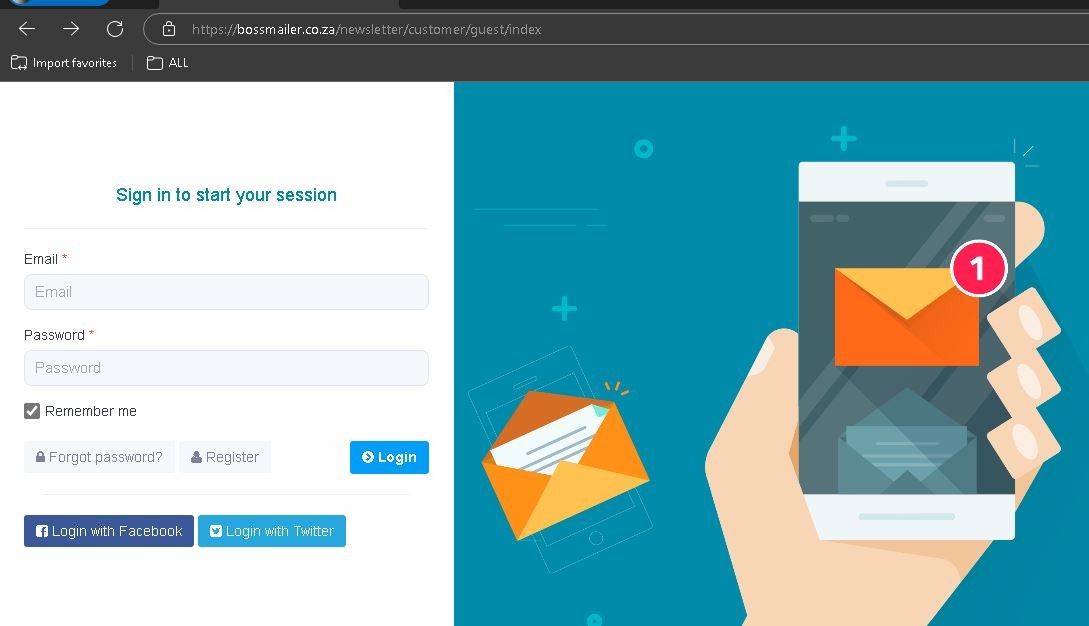
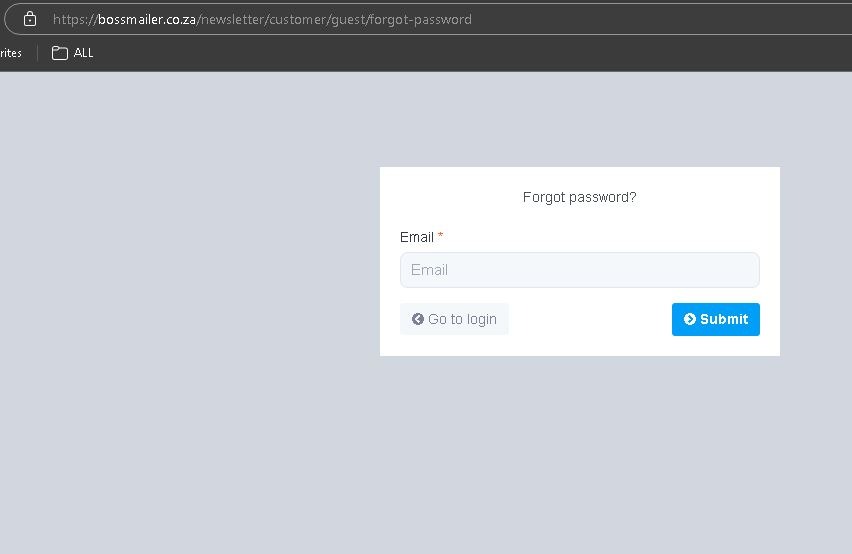
Forgot your password? No problem, we have you covered. Simply click on the "Forgot password" text below the login form and you will be redirected to our password recovery engine. Insert your email, click submit then follow the prompts in the password reset email sent from the BossMailer system.
1. Getting Started with BossMailer 🌐

When you first log in to BossMailer.co.za, you’ll be taken to the
Dashboard.
. This is where you’ll manage everything—from your email lists to your campaigns. Don’t worry, we’ll guide you through each section so you can easily find what you need.
Dashboard Overview:
- Quick Access to your email lists, campaigns, and reporting.
- Track Campaign Results like open rates and clicks
- See rate changes in attendance, participation of events as well as a geographical overview of users.
2. Create Your First Email List 📝
An email list is where you store your contacts, so they receive your campaigns. Follow these steps to create your first list:
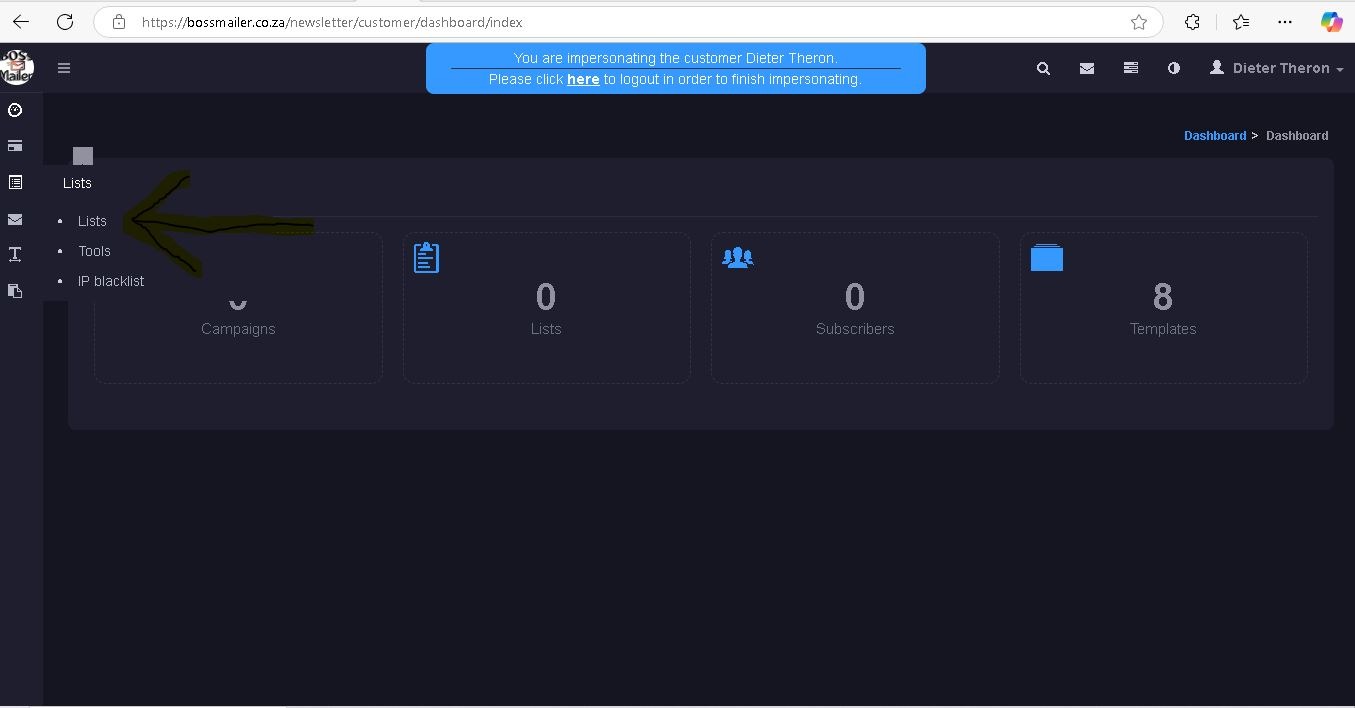
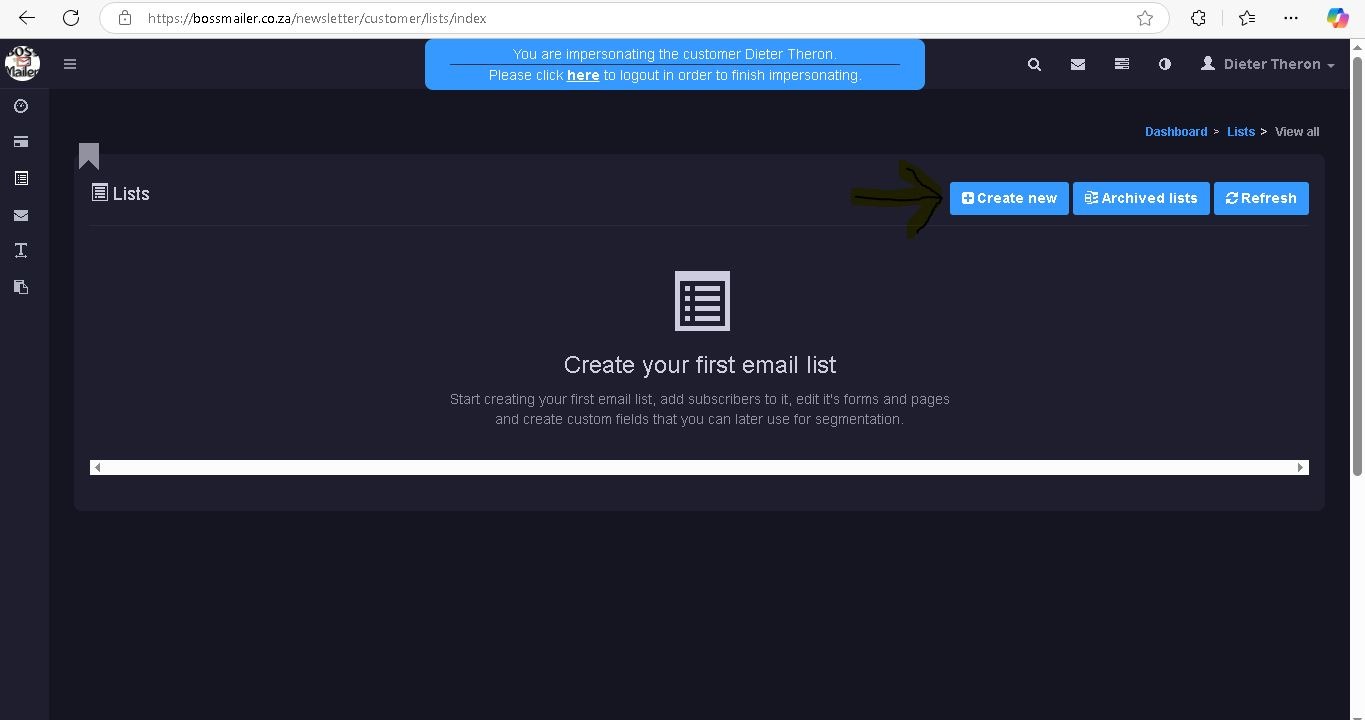
Number A: Create a New List
- Log in and go to the Lists section on the left side.
- Click Create New to start a fresh list.
How to Fill Out the 'Create New List' Form Correctly
Number B: Fill in Required Fields
Name*
This is the internal name of your list, visible only to you. Example: “Newsletter Subscribers” or “Product Launch Updates.”
Display Name
This is the name your subscribers will see. Make it clear and recognizable, such as “Weekly Updates from [Your Brand].”Description*
Provide a detailed description of the list's purpose. This should help subscribers easily understand what they are signing up for. Example: “Get the latest updates, exclusive offers, and news from our team.”Welcome Email
Choose whether to send a welcome email when someone subscribes. Selecting “No” means no immediate email will be sent.Opt-In
Double Opt-In: Subscribers receive a confirmation email to verify their subscription. This is recommended for compliance and to reduce spam complaints.Double Opt-In Confirmation: Choose “No” if you do not want a confirmation message displayed after the subscriber confirms.
Opt-Out
Double Opt-Out: Subscribers will need to confirm their Un subscription.Sub. Not Found Redirect
URL to redirect users when they try to unsubscribe but are not found in the list.Example: “http://yourdomain.com/subscriber-not-found”
Sub. Exists Redirect
URL to redirect users if they try to subscribe but are already on the list. Example: “http://yourdomain.com/subscriber-exists”Sub. Require Approval
Set to “No” if you do not need manual approval for each subscription.These are the default settings used for all campaigns sent to this list:
This is the name displayed in the sender field of the emails. Example: “Your Brand Name” or “Deep South Super Mom” (auto populated).
The email address that appears as the sender. Example: “sportsdepartment@yoursite.co.za” (auto populated).
The email address where replies to your campaigns will go. Example: “bookings@yourdomain.co.za” (auto populated).
This is the default subject line for emails sent to this list. Example: “Weekly Newsletter”
You can choose to receive email notifications when someone subscribes or unsubscribes from this list:
Set to “No” if you don’t want notifications for new subscribers.
Enter the email address where you want to receive subscription notifications.
Unsubscribe To
Enter the email address where you want to receive Un subscription notifications.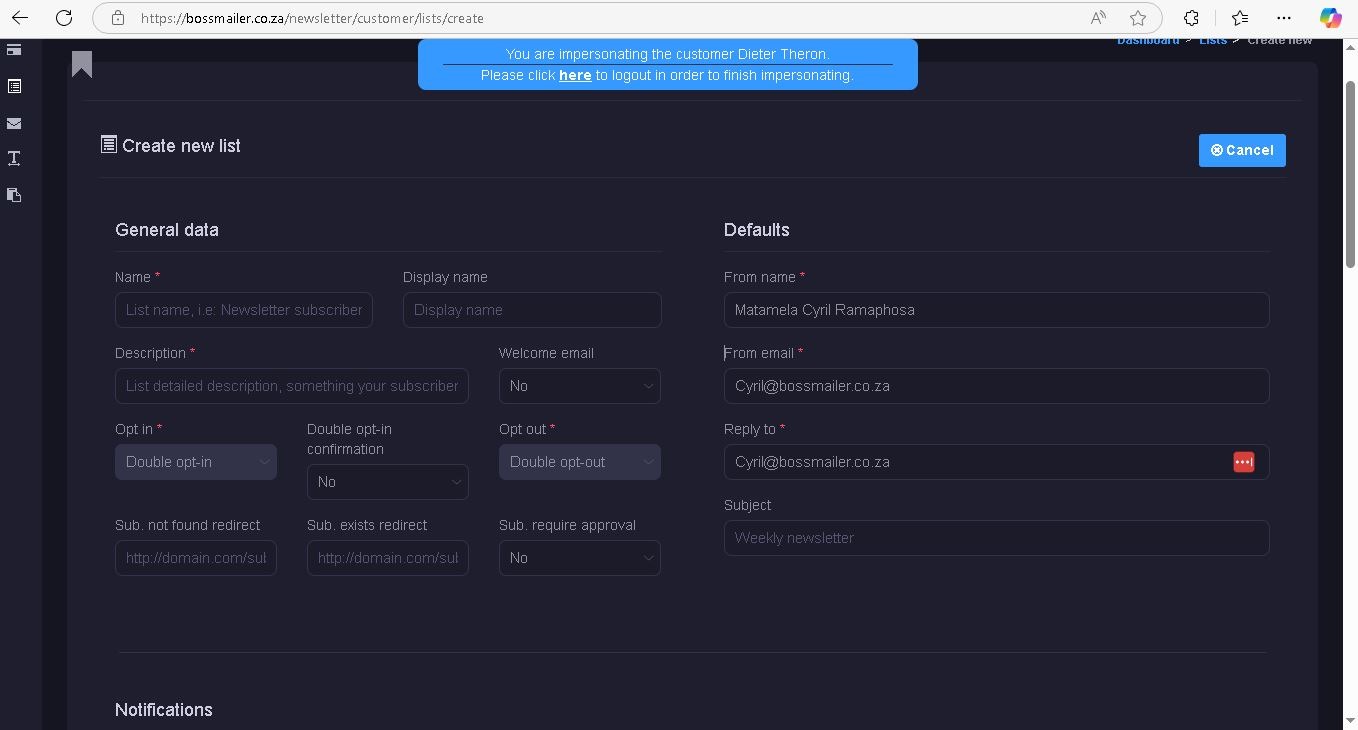
Subscriber Actions
Actions When Subscribe:
Choose actions that should be triggered when someone subscribes, like adding them to another list.
Actions When Unsubscribe:
Set actions for when someone unsubscribes, such as removing them from other lists.
Silent Unsubscribe:
If a subscriber exists on another list, they can be silently unsubscribed from that list when they join this one. No email notification is sent to them.
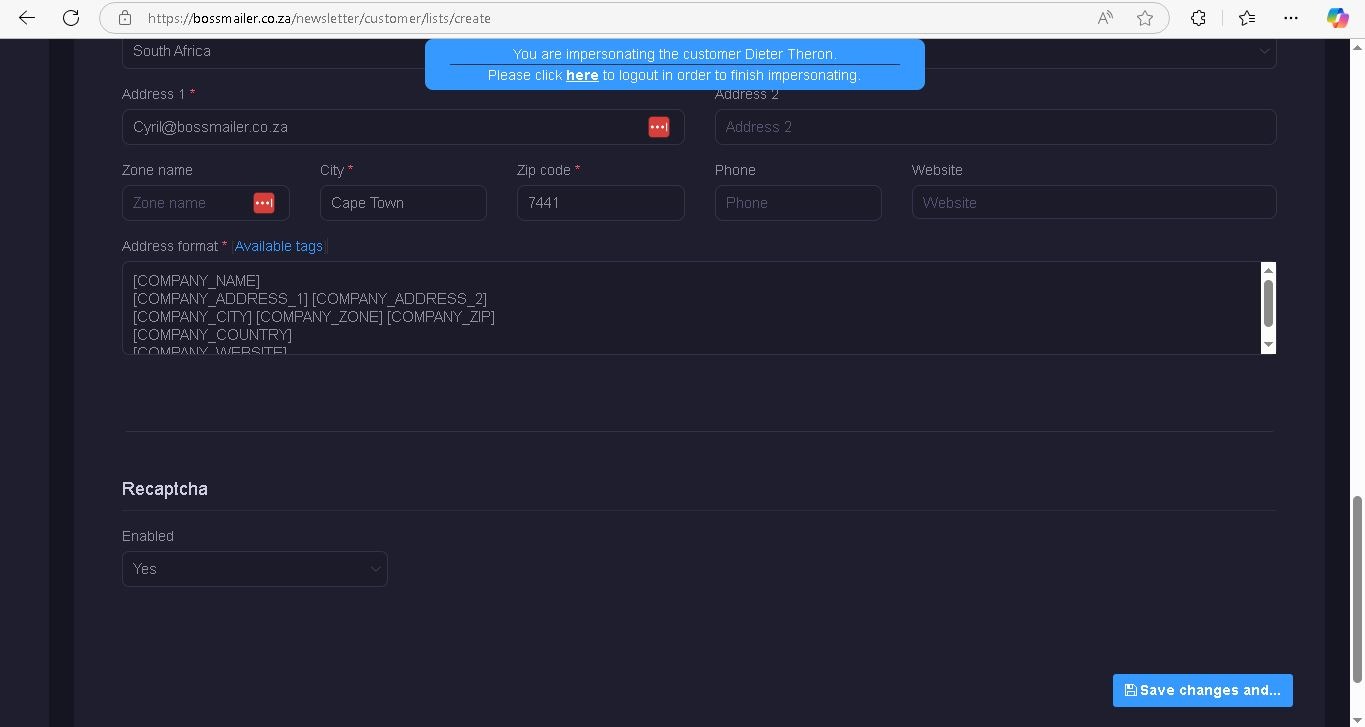
Before saving👇🏼, choose to activate recapcha. If you do not use this function, bots can fill out your form, a gazillion times, triggering, a gazillion email notifications, which consumes customer credits. Though BossMailer can send a gazillion emails, you might not want that, yet.
FINAL STEP: CLICK SAVE🖱
Important Note on Company Details:- The company details in your emails are automatically inserted by BossMailer.
- It uses the personal and company information you provided during signup.
- Make sure your profile details are accurate to avoid incorrect sender information.
Number C: Upload Your Contacts

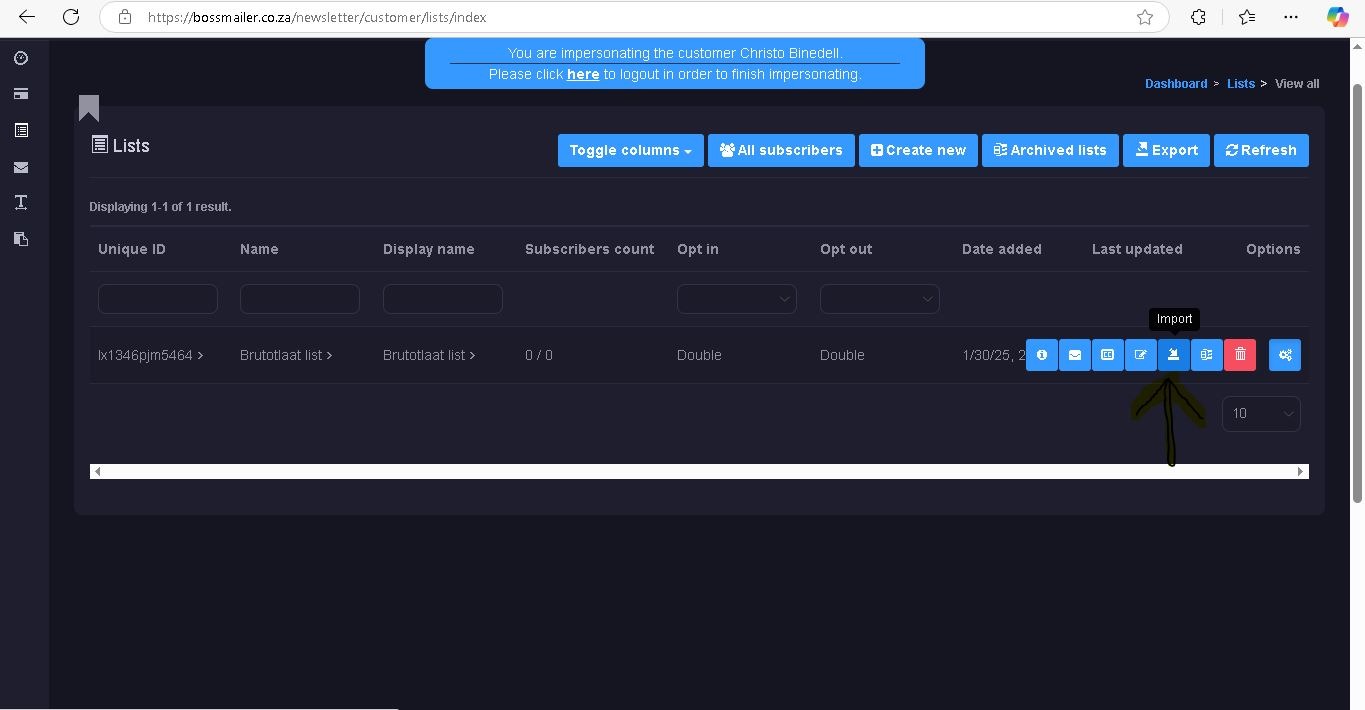
To upload your contacts, you’ll need a CSV file (which is a simple spreadsheet format).
Here’s how to do it:
- Click on your list’s Unique ID or Name
- Go to Tools and select Import
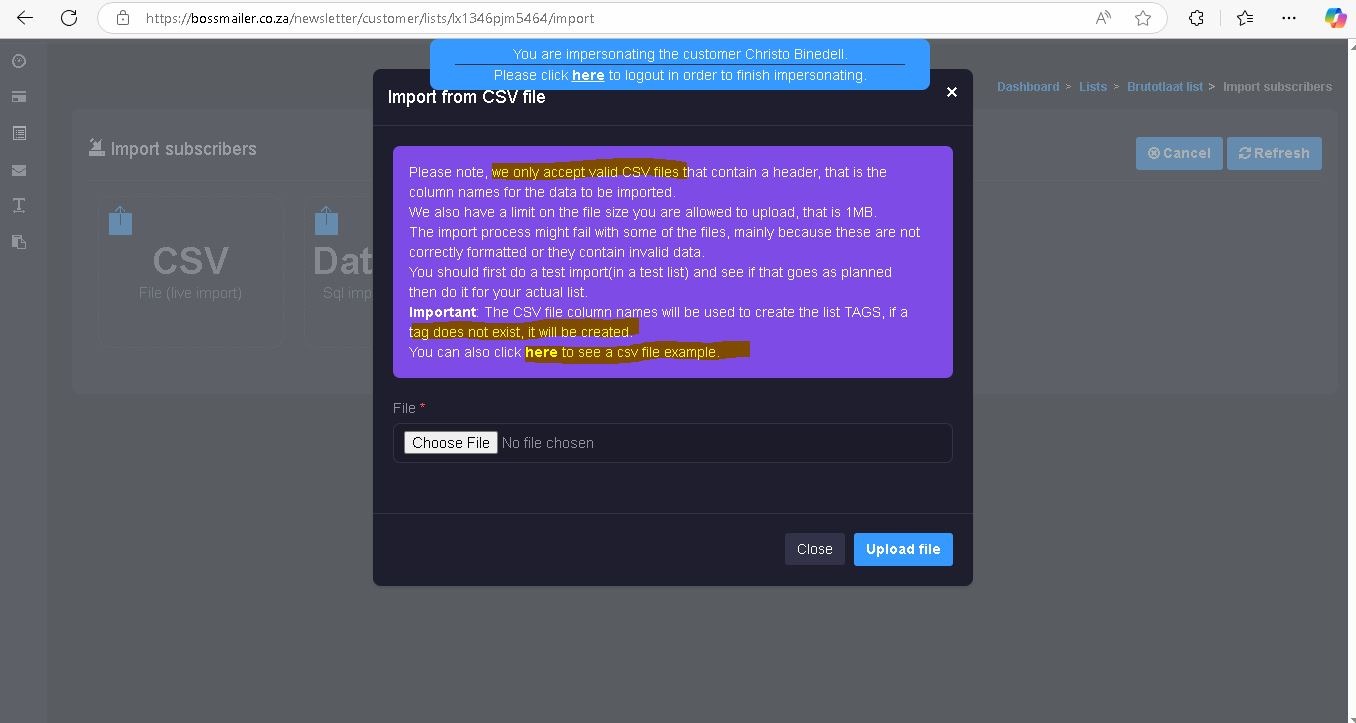
- Choose CSV and upload your file.
Row 1: Email, "First Name", "Last Name", "Age"
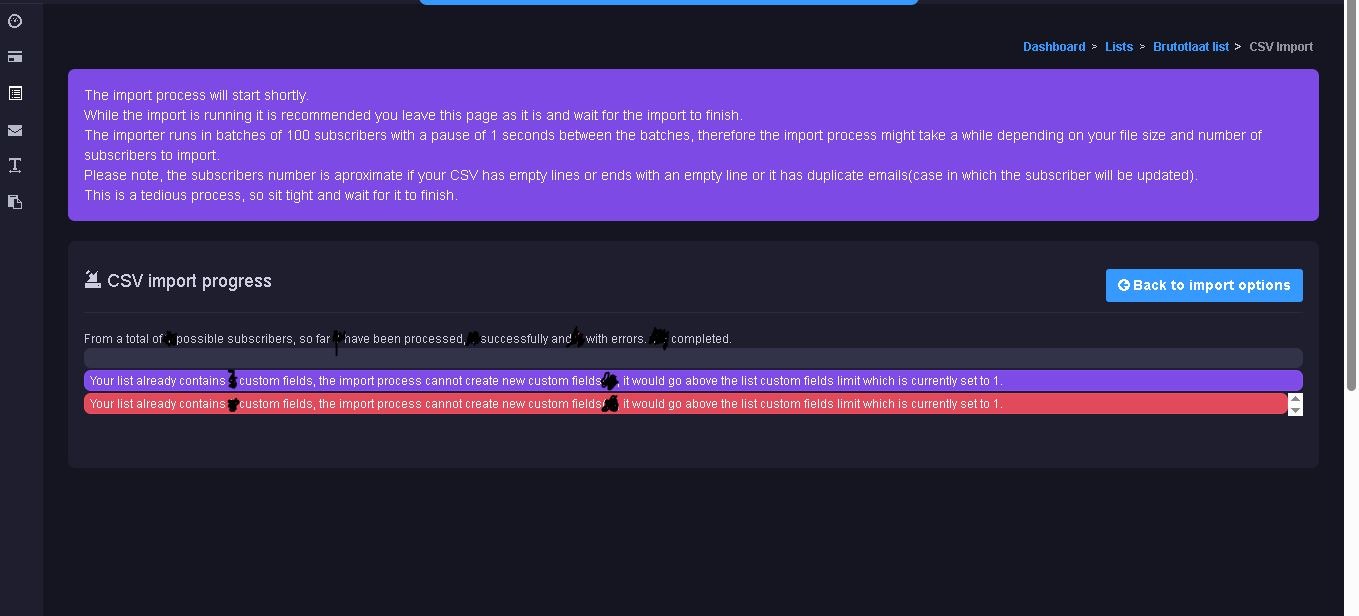
Row 2: john@example.com, John, Doe, 25Please be aware that custom tags(Databse Table headings) are limited to the customer tier. This means that is you are not on a pro plan then you will only be able to add 1 additional heading column to the table. If you are on the free tier, use the example csv as is. (paste your data into the downloadable example csv file instead, then reupload the file with your contacts data in it.)
Once your list is uploaded, click on the list name to ensure everything looks correct.
3. Create Your First Email Template 📑
Now, let’s design your email template! BossMailer makes it easy, whether you want to upload your own design or use the drag-and-drop builder.
Step 1: Go to Email Templates
- Navigate to Email Templates on the left.
- Click Create New to start a new template.

Step 2: Choose Your Method
You have three options to create your template:
Upload Template
: If you have an HTML email template ready, simply zip it (including any image files) and upload it.
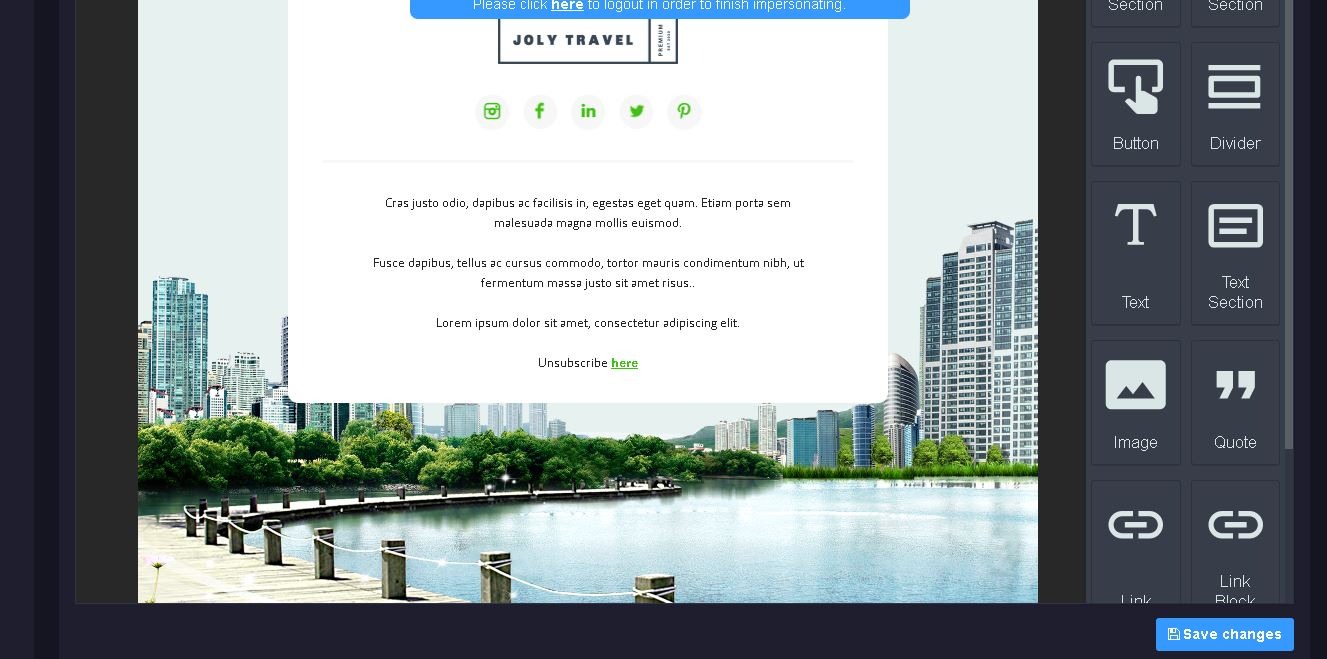
Drag-and-Drop Builder
For beginners, this is the easiest method. Just click
Toggle Email Builder and start dragging blocks (like text, images, buttons) to design your email.
Paste HTML Code
If you have custom HTML, go to the Source tab and paste it there.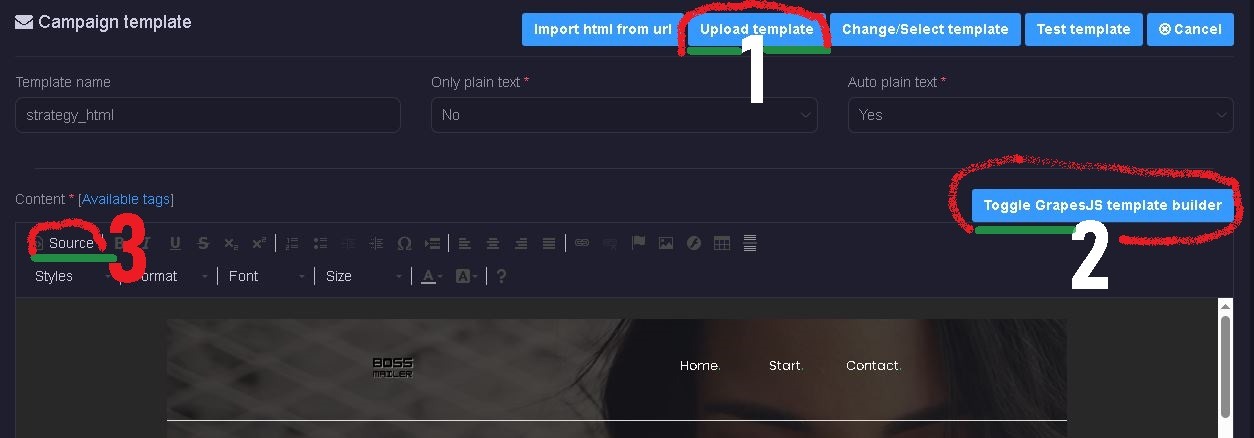
Step 3: Add the Unsubscribe Link
By law, every marketing email must include an unsubscribe link. Don’t worry! We’ve got you covered:
Copy and Paste This Code where you want the unsubscribe option to appear:
[UNSUBSCRIBE_URL]This is the magic code that makes the unsubscribe link appear.
No need to worry about complicated coding—just paste this line in
.
4. Send Your First Email Campaign 🚀
You’re almost ready to send your first campaign! Here’s how:
Step 1: Create a New Campaign
- Go to Campaigns > All Campaigns > Create New.
- Enter the Campaign Name, Subject Line, and choose the list of people to send to.
Step 2: Set Up the Campaign
- Choose your email template (the one you just created).
- Decide if you want to send the email immediately or schedule it for later
- Set the tracking options (leave them at default for now—this tracks opens, clicks, etc.).
Step 3: Send a Test Email (Optional but Recommended)
Before you send to your entire list, it’s a good idea to send a test email:- Click on your template to open it.
- Select Send Test Email and check how it looks in your inbox.
- Once you’re happy with everything, hit Send and your campaign will be on its way!
5. Troubleshooting Tips 🔧
1.CSV Upload Issues
If your CSV file isn’t uploading properly, or if the number of contacts uploaded is less than the number saved, try the following:
Check for Empty Rows: Make sure there are no blank rows or extra spaces in your CSV file.
Correct Format : Your file should have headers like Email, First Name, Last Name, Age (use this exact format).Remove Invalid Emails: Sometimes, invalid or incomplete email addresses can cause uploads to fail. Make sure all emails in your file are correct.
2. Click Rates Not Updating
If your click rates aren’t updating, here’s what you can do:
- Wait a Bit: Sometimes, it takes a few minutes for the system to update after sending a campaign. Check back shortly.
- Tracking Settings: Ensure that you have tracking enabled when creating your campaign (this is set by BossMailer by default, but it's good to double-check!).
3. Emails Not Sending Immediately
If your emails aren’t sending immediately, check these steps:
Scheduled Time: Double-check the schedule time you set. If it's scheduled for later, the emails won’t send until that time.
Server Issues: If there’s an issue with the server or service provider, it could cause a delay. You can contact support to confirm if there are any ongoing issues.
4. Test Emails Not Received
If you’re not receiving your test emails, try these fixes:
Check Spam Folder: Sometimes, test emails end up in your spam or junk folder. Make sure to check there.
Email Address: Ensure that the email address you entered for testing is correct.
Email Quotas: If you've recently sent a lot of emails, you may have hit an email sending limit. You can check with support to confirm.
Eco RSA
Please take a few seconds and fill in the list details in order to subscribe to our list.
You will receive an email to confirm your subscription, just to be sure this is your email address.
No-Code Intergrations
Supercharge your marketing efforts with BossMailer's no-code intergration services.
Reach billions of active users and grow your audience through targeted campaigns and personalized messaging.
YouTube
Share and stream videos to boost brand awareness and connect with your audience in a visually engaging way.

Engage in real-time, direct communication with customers, and build stronger relationships with personalized messages.
Showcase your brand through stunning visuals and engage with a community of followers through interactive campaigns.
TikTok
Tap into the power of short-form video trends to drive virality and connect with a younger, engaged audience.
Expand your reach in China with this all-in-one messaging, social media, and payment platform for businesses.
HubSpot
Automate your marketing, sales, and customer service workflows to grow your business efficiently.
Salesforce
Manage customer relationships and track sales with one of the leading CRM platforms.
Zoho CRM
Simplify lead and customer management, and automate workflows to enhance engagement.
OpenAI
Leverage AI for personalized customer support, content creation, and data-driven insights.

Google AI
Integrate powerful machine learning models to enhance your marketing strategy and customer insights.
Shopify
Enhance your e-commerce store’s marketing and customer communications with automated workflows.
WooCommerce
Integrate with WooCommerce to create highly targeted email campaigns and customer journeys.
Magento
Automate your e-commerce store’s marketing campaigns and boost customer retention with targeted emails.
QuickBooks
Integrate financial tools for invoicing, accounting, and expense tracking directly within your email marketing campaigns.

Stripe
Seamlessly integrate payment processing for smooth customer transactions and automatic receipts.

PayPal
Track payments, subscriptions, and automated email notifications for customer transactions.